Manage Content Blocks
How to access
- Install the component Geek Content Blocks as you normally would via Joomla Installer.
- Select Components → Geek Content from the dropdown menu of the Administrator Panel.
Install sample data
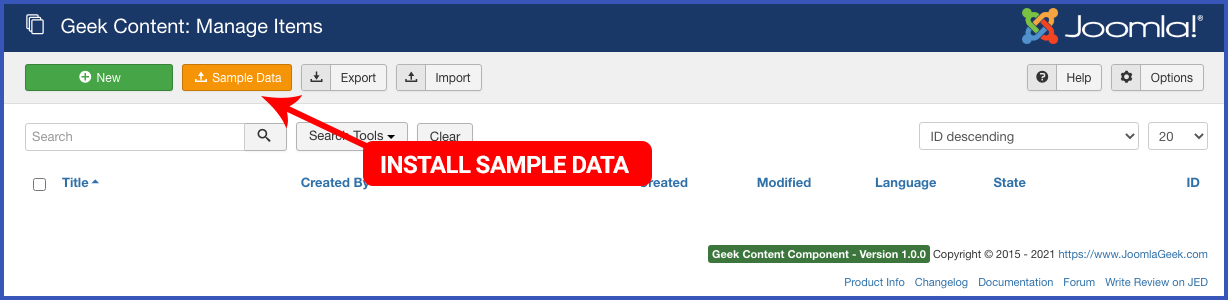
- After the component is installed, there are no items on the Manage Items page by default.
- You can install sample data to get started.
- Click on the button “Sample Data” on the toolbar to open the modal box where you can select the Sample Data file to install.
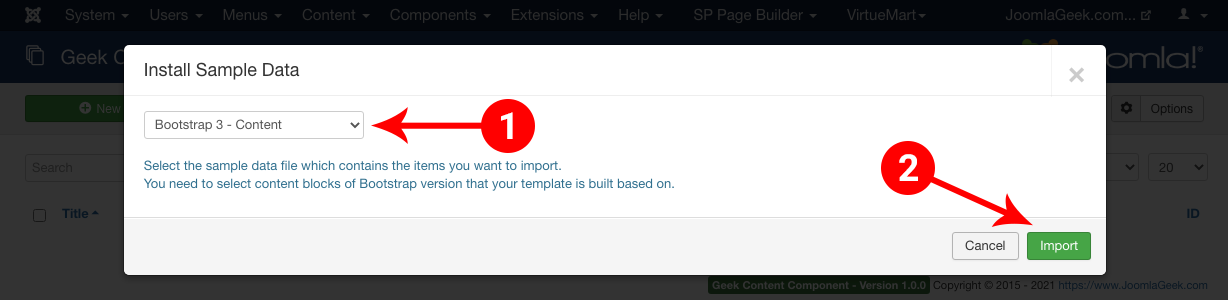
- Select the sample data file from the select box (1) which contains the items you want to import.
- You should import content blocks of Bootstrap version that your template is built based on.
- Click the Import (2) button to start the import process.
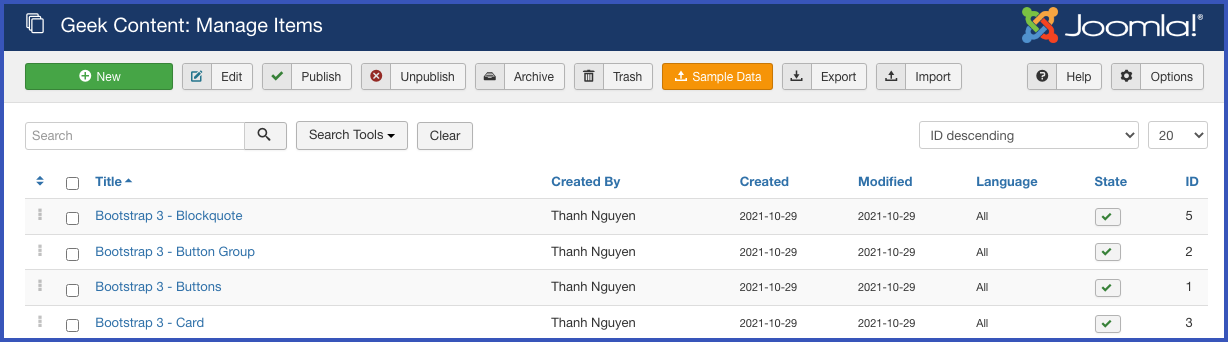
- Once the data is imported, you will find some sample content blocks created on the Manage Items page.
Create Content Block
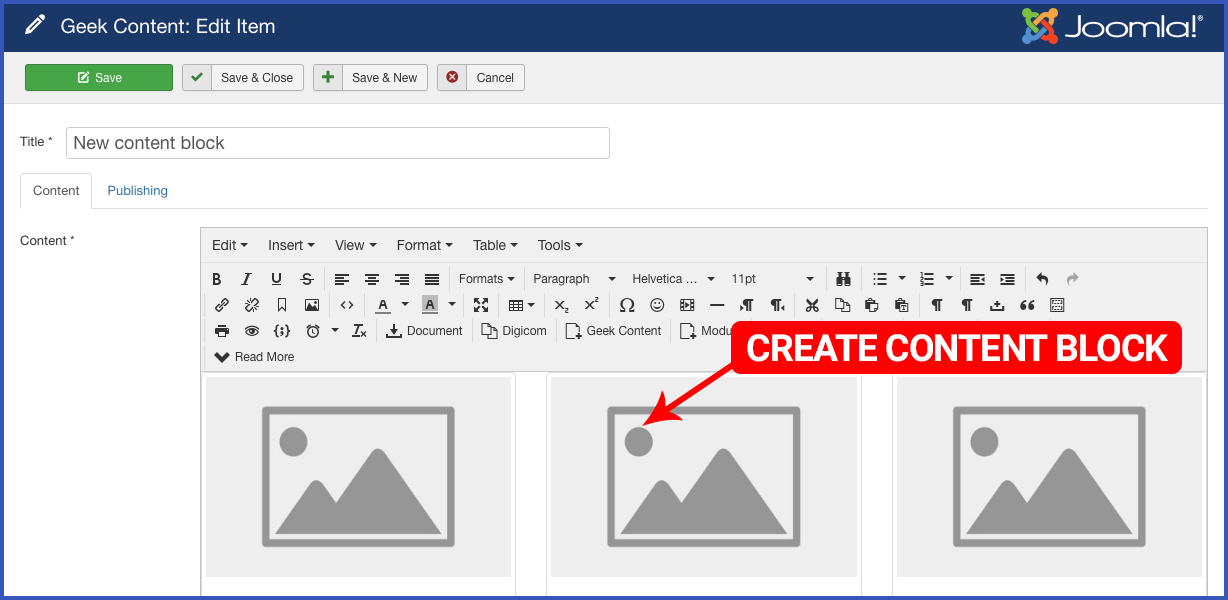
- Click the “New” button on the toolbar to open the editing screen to create a content block.
- On the editing screen, enter the title and content of the content block.
- You will find other settings of publishing under the Publishing tab.
- Save. Saves the content block and stays in the current screen.
- Save & Close. Saves the content block and closes the current screen.
- Save & New. Saves the content block and keeps the editing screen open and ready to create another content block.
- Save as Copy. Saves your changes to a copy of the current content block. Does not affect the current content block. This toolbar icon is not shown if you are creating a new content block.
- Close. Closes the current screen and returns to the previous screen without saving any modifications you may have made.
Export data
Click on the Export button on the toolbar to download all content blocks as XML file. This feature enables you to share content blocks between your websites.

Import data
Click on the Import button on the toolbar to open the modal box where you can import content blocks.

- On the modal box, click on the “Choose File” button to choose the XML file which contains the items you want to import.
- You can select XML file that was exported from another website.
- Or you can create a new one. To see a sample XML file, please create a test item, then press the Export button in the toolbar to export.
- Click on the button Import to start the import process.

Configure TinyMCE editor
TinyMCE is a WYSIWYG (what you see is what you get) editor. It is the default editor to use when editing Articles and other content.
It enables you directly edit and manipulate the look and content of article. This means that the content displays in editor in backend will display the same way as it will be displayed on frontend.
In order to do that, TinyMCE editor will check if there is a file “editor.css” in your default template. If any, it will load this css file to the Editor screen. This helps content in the editor will be display as it will be on your site on frontend.
However, not of all Joomla template supports the “editor.css” file, so you need to configure Plugin editor - TinyMCE to specify custom css file that you want to load to the editor. Almost templates are based on Twitter Bootstrap framework, so you can load the css file of Bootstrap version that your template is built based on to the editor.
You can follow steps listed below to load the custom css file in the TinyMCE editor:
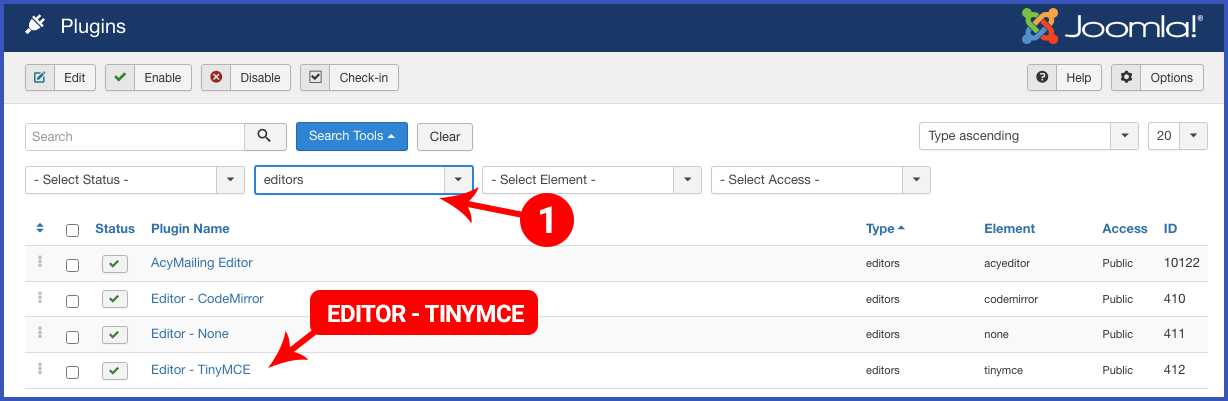
- Select Extensions → Plugins from the dropdown menu of the Administrator Panel to navigate to the Manage Plugins page.
- On the screen manage plugins page, filter plugins by type “editors”
- Click on the plugin name “Editor - TinyMCE” to update its settings.
Load Custom CSS file
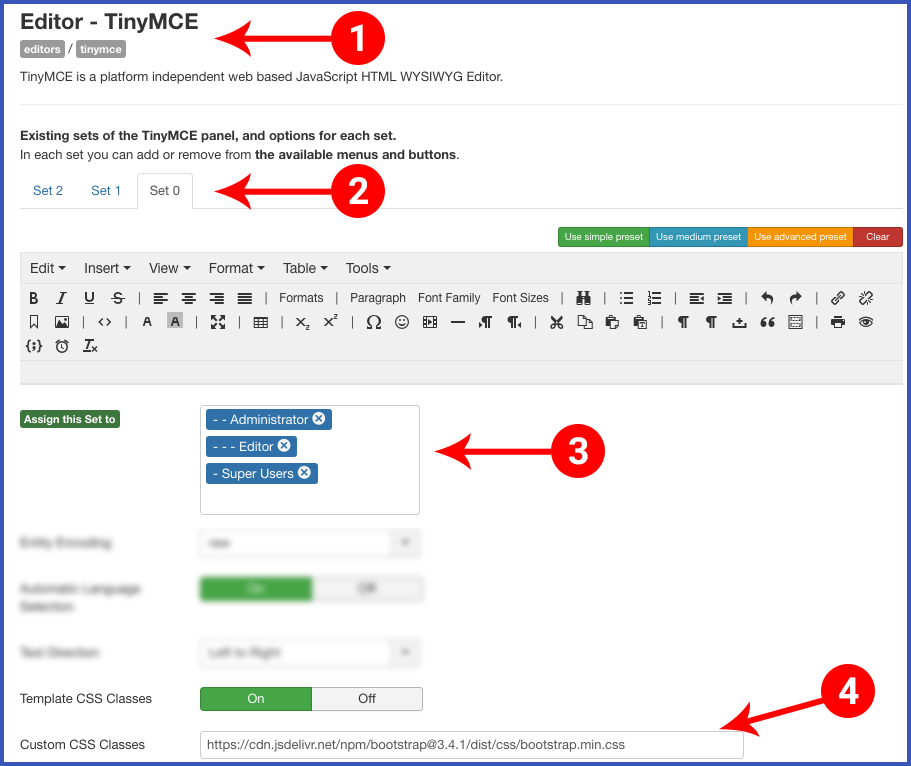
- On the screen configure plugin Editor - TinyMCE
- Click to the tab “Set 0”. Set 0 is the most extended toolbar and is by default assigned to the Administrator, Editor and Super Users.
- Scroll down to the setting “Custom CSS Classes”
- Enter the full URL path to a custom CSS file that you want to load.
Bootstrap CDN
Since most Joomla templates are based on Twitter Bootstrap framework, you can load the css file of Bootstrap version that your template is built based on to the editor.
This will help to display content blocks created from Bootstrap components correctly in the TinyMCE editor.
You can get CND links of all Bootstrap versions from the website https://www.bootstrapcdn.com/ or https://cdnjs.com/libraries/twitter-bootstrap
Below is the list of CDN urls for some Bootstrap version that you can use. Please remember to select correct Bootstrap version that your template is built based on.
- Bootstrap 5 (used for the default template of Joomla 4): https://cdn.jsdelivr.net/npm/bootstrap@5.1.3/dist/css/bootstrap.min.css
- Bootstrap 4: https://cdn.jsdelivr.net/npm/bootstrap@4.6.0/dist/css/bootstrap.min.css
- Bootstrap 3: https://cdn.jsdelivr.net/npm/bootstrap@3.4.1/dist/css/bootstrap.min.css
- Bootstrap 2 (used for the default template of Joomla 3): https://cdnjs.cloudflare.com/ajax/libs/twitter-bootstrap/2.3.2/css/bootstrap.min.css
Create content using content blocks
Create article
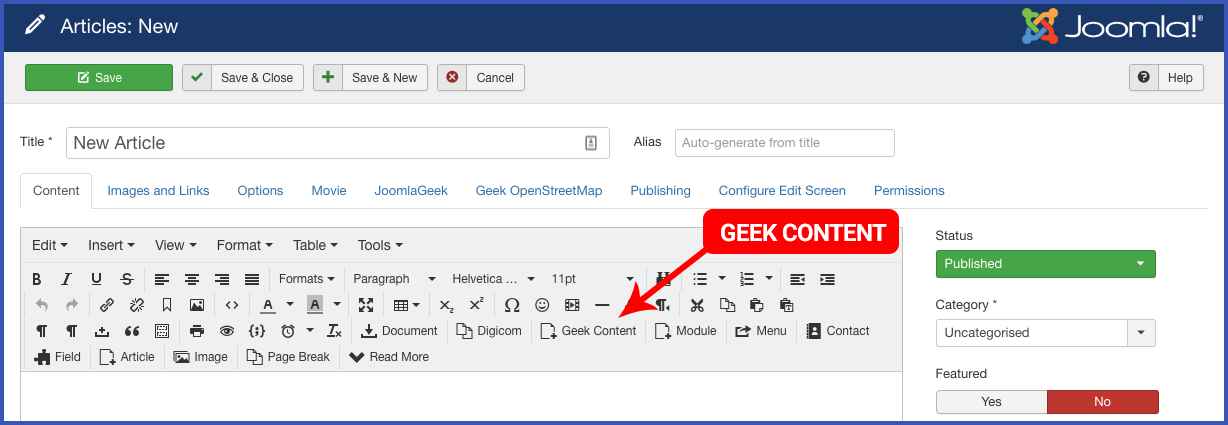
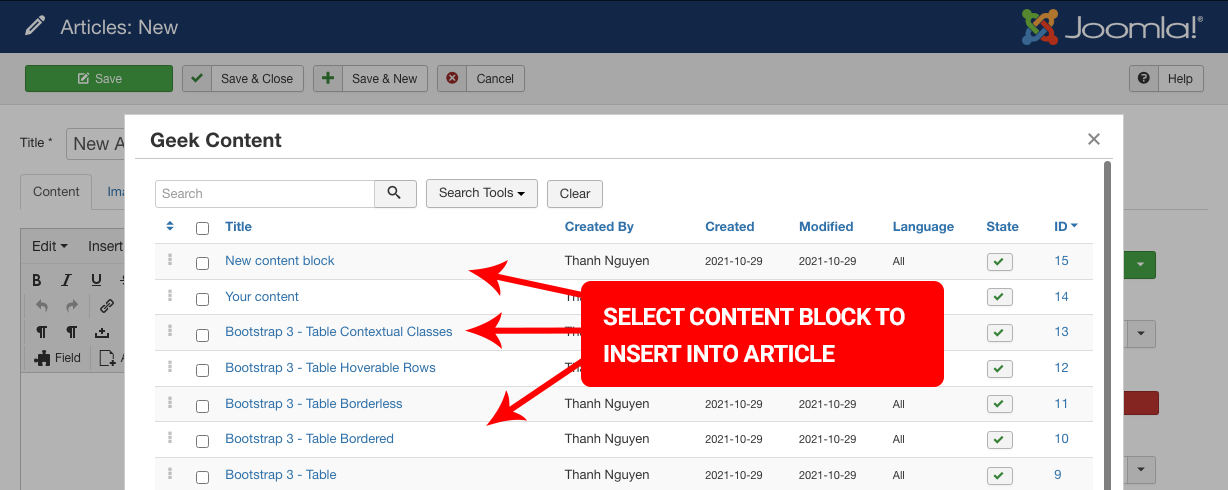
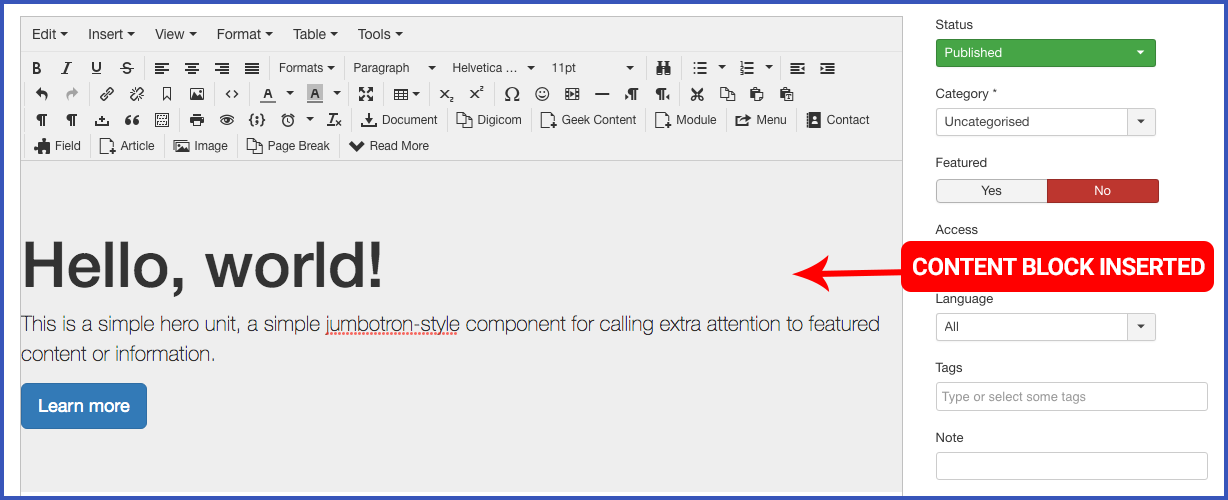
Once you have installed Geek Content Blocks successfully on your website. On the Editing Article screen, you will see the new button “Geek Content” on the toolbar of editor.
You can click on this button to open the modal box where you can select your content blocks to insert into your article.
Create other-content
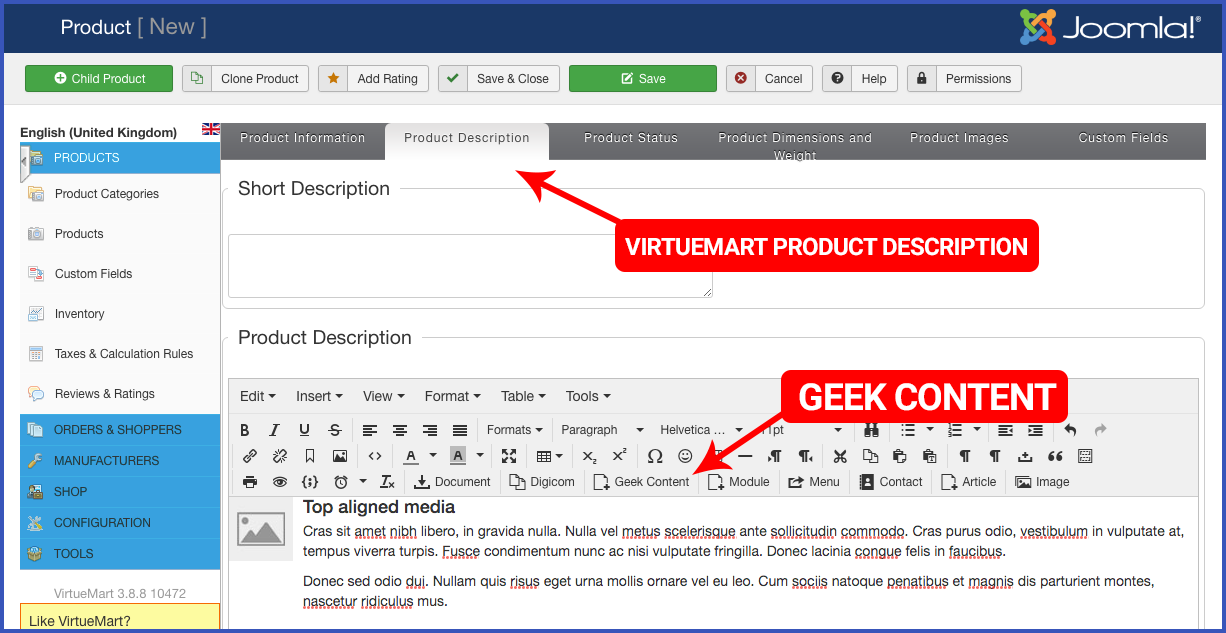
Geek Content Blocks component does not only support Joomla articles but can also build content for 3rd party components which uses Joomla editor to create and format content such as Custom HTML module, VirtueMart product, EasyBlog post, EdocMan document, etc…
Below is the screenshot of building VirtueMart product’s description from content blocks.